Reconditioning an Old CTS Pot
Last updated 9/9/06
By Paul Marossy
I wouldn't ordinarily mess around with trying to recondition a scratchy sounding old potentiometer, but I will make an exception in some cases. People like to use contact cleaner to try and fix a scratchy old pot, and it works some of the time for wah pedals. But if your pot is pretty gummed up inside, it usually is just a temporary measure. The scratch eventually comes back again because of all the gunk on the inside. And when you get a wah pedal that maybe six other people owned before you got a hold of it, who knows how much gunk is in the pot?!
In the case of the hard to find 25K pot used in the Maestro Boomerang, I think it is worthwhile to try and recondition the old pot - they are higher quality than generic off the shelf pots available today and you can also take them apart, clean them and reassemble them to have a new sounding pot again! It usually takes me about 30 minutes to recondition an old pot.
Here's what you have to do:
 |
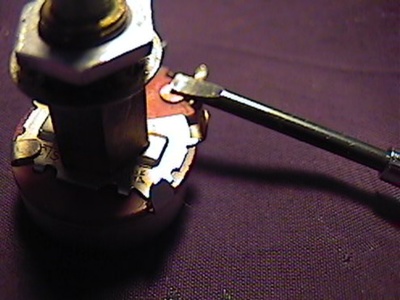
After removing the gear from the pot, loosen the nut that holds the pot in the enclosure. I had to use a 9/16" wrench and a crescent wrench to get the pot out of there. Some later Boomerangs have a different style pot, but they can also be taken apart and cleaned. Obviously, you'll have to desolder the wires that are connected to the pot. |
 |
After the pot is out, you can carefully pry up the four tabs that hold the cover on the pot, taking care not to bend them up any more than you have to to get it off. Be careful when removing the cover - it should gently come off. |
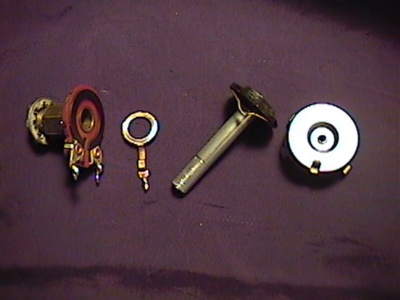 |
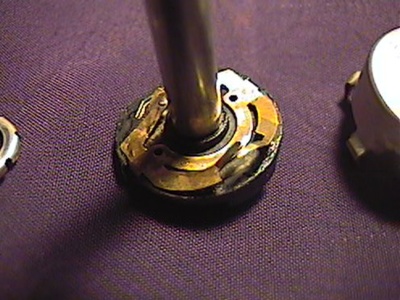
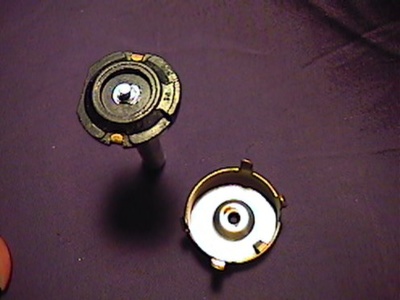
Once you get the cover off, the pot will come apart. This particular pot was made by CTS and has four main parts: the cover, the shaft/wiper assembly, the wiper contact ring and the resistive track. Once all the parts are on the workbench, you can use a Q-Tip and some Isopropanol 67-63-0 alcohol to clean the parts. You want to thoroughly clean everything up, paying particular attention to the parts that make contact inside. The resistive strip will need several passes before it's thoroughly cleaned up. |
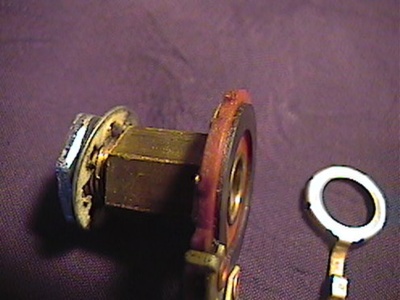 |
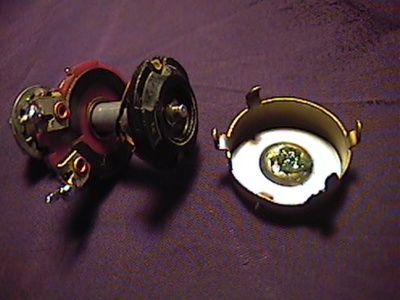
I was surprised to see such a thick resistive element in this pot. It's at least 1/64" thick. Much thicker than any modern pots of similar construction. This will last for many more years to come. |
 |
This is the part that makes contact with the resistive element. Make sure there is absolutely nothing left on these parts when you are done. Be careful not to bend or break these copper tabs. If you do, your pot will be trash. I like to bend up the tabs slightly to retension them while I'm at it. |
 |
This particular pot has a little shaft that pokes thru the cover. You don't have to pay to much attention to this area other than getting old gunked up grease off of it. |
 |
After everything is cleaned up, it's time to reassemble it. I like to put a dab (I mean a small dab) of grease on the shaft that the gear is connected to, and in this case, also on the piece that pokes thru the cover. |
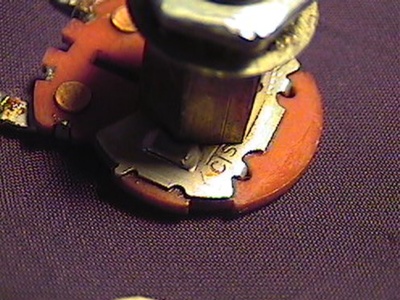 |
Sometimes, in addition to the date/manufacturer source code, the manufacturer's name will also be stamped on the body somewhere. You can clearly see "CTS" stamped on the body here. |
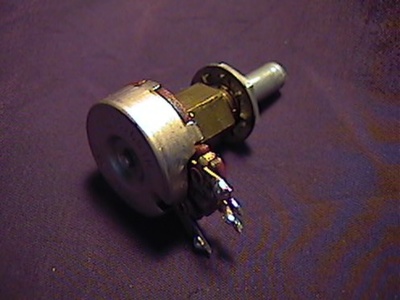 |
And here is the pot all back together again - good as new! All that's left to do is to put it back in the enclosure and solder the wires back to the pot. |
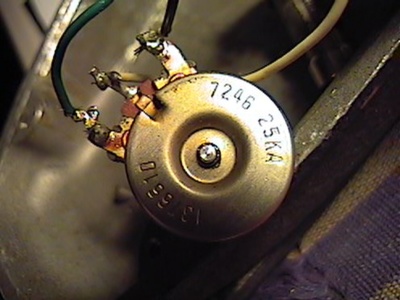 |
The date code "7246" shown indicates that it was made in the 46th week of 1972. It still can get a lot of mileage now that it's been cleaned and reconditioned. |
I generally wouldn't recommend doing this with standard vintage 100K pots as you can get replacement Dunlop Hot Potz II wah pots that will last a very, very long time. I would rather have a functioning wah pedal rather than an all original scratchy sounding one. But heavy duty 25K wah pots are practically impossible to find, and hence the reason why I took the time to bother with it and why I wrote up this page. :-)