Replacing a Blown Filter Cap
By Paul Marossy
Last updated 9/2/05
This story starts with the acquisition of my
Marshall 9005
rack mount stereo power amplifier from a good friend of mine.
I got the amp for a very low price, and it was in great shape. I had the amp for two weeks before I got a chance to
power it up to see what it sounds like. I was really enjoying the stereo delay patch on my ART SGX2000 effects unit that I had going through the amp, when about ten minutes after power up, I heard this noise that sounds exactly like that "PSSSSTTT" sound you hear from that Pixar Animation lamp "popping the ball". Then it was no sound, smoke pouring out of the back of the amp, and a terrible noxious smell. I de-powered it immediately and took it outside to pull off the bottom cover off to assess the damage. I was relieved that it appeared to only be one of the LCR filter caps, which literally blew a hole in end where the terminals are and squirted this oily stuff all over everything (electrolytic fluid). Being relieved that is was "just a filter cap", I proceeded to clean off this substance from all of the interior surfaces left behind by this now deceased filter cap while it was still hot to make the removal process easier. Fortunately, most of it went on the bottom cover.
I have to admit that this took me by surprise because the amp had apparently been well taken of. However, after thinking about it for a while, it occurred to me that it hadn't been fired up for probably five years and it had also been sitting in a HOT garage for about two years in what is probably 140-150 deg. F in the summer. A perfect set of conditions for premature aging of big power filter caps. Maybe this could have happened anyway, after all the amp is 15 years old now. If you are reading this page, then you may also be familiar with the concept of "forming" filter caps. This is one case where I should have "re-formed" the filter caps, but it didn't occur to me at the time that I should do that - my bad. I do remember reading about this topic here and there, but I never took it that seriously. Well, after this, I will!
Back to "forming" caps... in electrolytic type caps, the insulation is the oxide film on one of the two aluminum foils inside. The other foil is not oxidized. The conductive electrolyte resides between these two foils. The liquid in electrolytic caps is and must be conductive for the cap to work. When the operating voltage has not been applied to the cap for long periods of time, it lets the oxide "un-form". Keeping the operating voltage on them keeps any weak spots "formed up". For this reason, it's a good idea to use a light bulb current limiter when powering up an amp that hasn't been powered up for a long time. The limiter will prevent a catastrophe in the amp if something is awry.
While waiting for my four new J&J filter caps from
Antique Electronic Supply
I looked for signs of any other damaged components in all of the upstream B+ wiring and also the rectifier diodes, but didn't find anything that looked suspicious. And, while I was waiting for my new caps to arrive, I built my own
Amp Current Limiter
device so I could safely test the amp after replacing the filter caps to see if that was really all that was required.
|
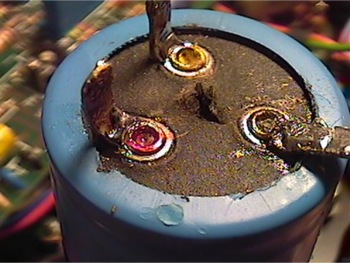
Here is the cap that started all the trouble. Notice that hole blown thru the center. This is where all the electrolytic fluid escaped from when it blew. |
|
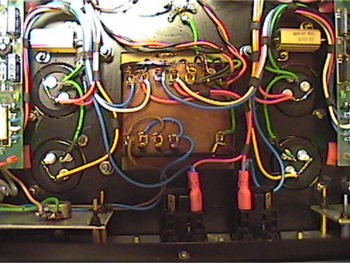
Here are the new caps installed. It took about an hour or so to take out the old caps, put the new ones in and solder all of the wires to the caps. |

|
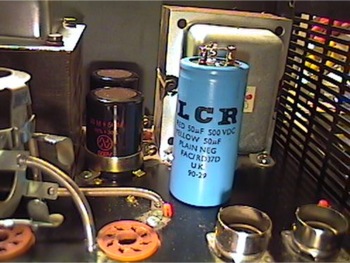
These are the new caps from the exterior. These are J&J caps, electrically identical and physically similar to the original LCR caps (but shorter). |
|
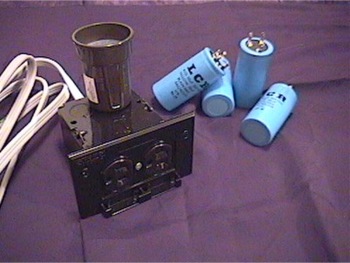
This is a size comparison between the old and new caps. The J&J caps are about 1" shorter than the LCR caps. |
|
Here is my amp current limiter just after completion. It's built out of a deep metal Raco switchbox. On the side is a duplex outlet and the light socket sits on top (light bulb not installed yet). I went with this type of light socket because it allowed me to have it totally enclosed, thus maximizing safety. The metal box is also connected to ground. I painted the box black to make it look more spiffy. It took roughly 1-1/2 hours to fabricate. |
|
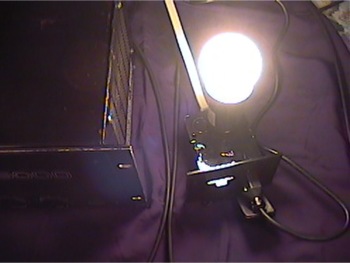
Here the amp current limiter is in use. This is immediately after power up. Notice how bright the bulb is. The bulb is a 40 watt bulb. |
|
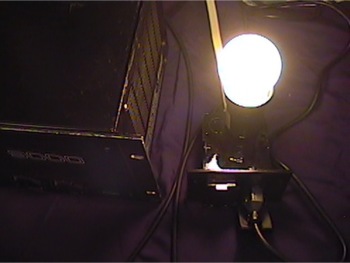
This is what the light bulb looks like after a couple of minutes. The fact that it is now somewhat dimmer than it was before is a good sign that the amp is probably working OK now. Looks can be deceiving, though. The power switch wasn't lighting up and the tubes weren't glowing, but they were getting warm. I was starting to get a little worried, but the real test was hearing my guitar thru the system - then I knew all was well. |
|
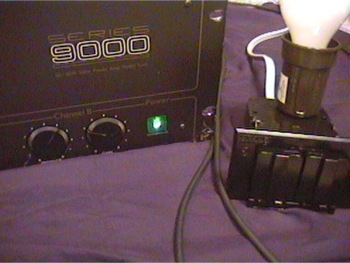
The green light means all systems are a go! I think I was fortunate that nothing else was damaged in this incident. |
|
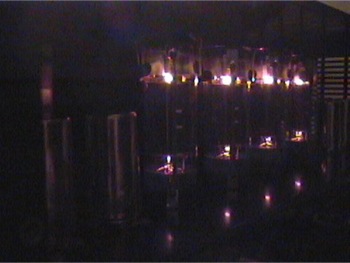
The power tubes are all looking good as well and also seem to have survived the incident unscathed. |