Silver Face Twin Reverb Bias Control Mod
Last Updated 02/08/05
By Paul J. Marossy
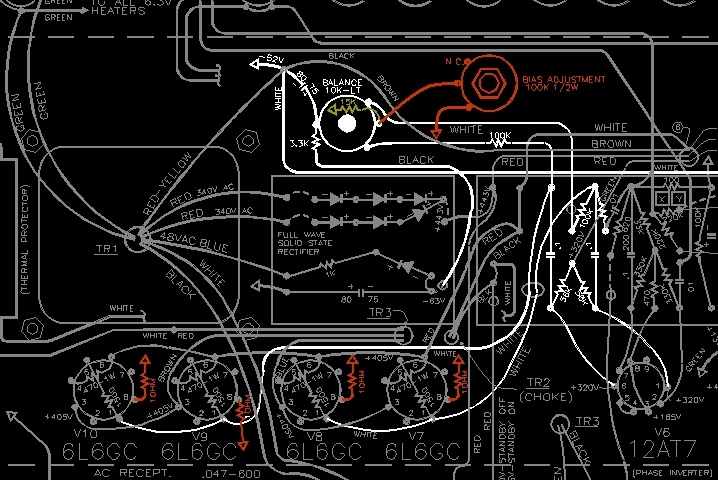
One of the main differences between a black face and silver face Fender Twin Reverb is
the bias adjustment arrangement. In the black face and early silver face amps, there is a
power tube bias adjustment pot. In the silverface amps, this bias adjustment pot was omitted and became
a hum balance pot instead. The hum balance pot is used to minimize the amount of hum between the pairs
of power tubes. In my own Twin Reverb, I have a hum balance pot and a bias
adjustment pot. If you are happy with the silverface Twin Reverb sound but want to have a bias adjustment
pot as well, it's very easy to add one. This way, you get the best of both worlds.
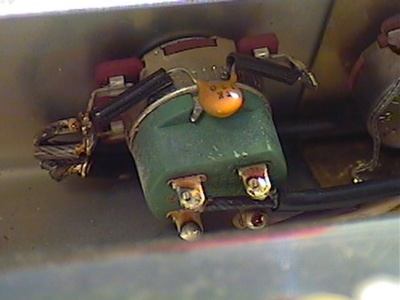
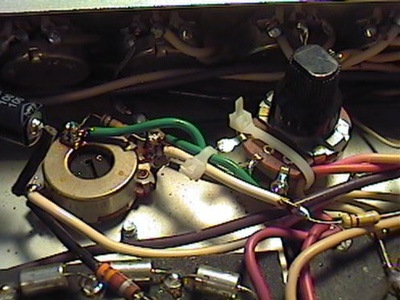
Here's how to do it. In the picture below, the hum balance and associated components are shown in
white. The hum balance pot will remain as is with the exception of removing the 15K resistor (shown
in greenish brown) from its connection to ground. In place of this resistor will go a 100K 1/2 watt
pot, wired as a variable resistor (shown in red). This will give you a bias adjustment pot. Make sure you
use a resistor between the pot and the connection to ground to prevent the power transformer from being
damaged by preventing the negative bias voltage from being directly shorted to ground. Use at least a 3.3K
resistor here, maybe even a 4.7 to 6.8K.
The next part of this
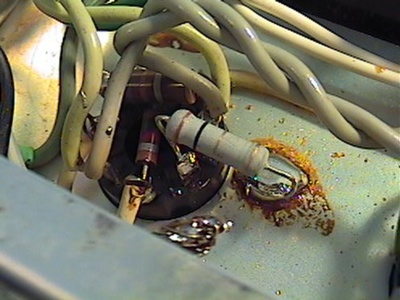
mod has to do with measuring the bias current conveniently. This is another very simple thing to do. Find
Pin 1 (cathode) on the power tubes (V7, V8, V9 & V10). These pins should be directly connected to the chassis (unless
your amp has aleady been modified). Between Pin 8 and ground, we will insert a 1 ohm / 1 watt resistor (also shown in red). The
purpose of this resistor is to make measuring bias current easy. Setting your DMM to measure millivolts,
measure the voltage across the 1 ohm resistor. If you measure 34mV, then thanks to Ohm's Law, you will
have effectively have 34 milliamps of bias current flowing through that power tube. Adjust the bias control
as required for your power tubes. They most likely won't all be exactly the same, but they should
be within a few milliamps of eachother if you really do have a matched set of power tubes and all
of your resistors are good. The hum balance pot will also have some small affect on how the power tubes
bias as well as minimizing hum. Generally, the lower the hum, the lower the bias current will be. A small
amount of hum is pretty normal, so don't get worried if you hear a little bit of it. Also, one thing
to note is that a few of the resistor values shown on the layout below differ from the schematic. A previous
owner had them changed for some reason. I didn't feel the need to change them to original specs.
 |
|
 |
|
 |
|
Of course, it almost goes without
saying, be very careful inside your amp while measuring the bias as there is line voltage and
high voltage DC in close proximity to the resistors you will need to measure!