Constructing Tube Coolers
Last updated 1/26/04
After finding this article about PEARL Tube Coolers (see links at bottom of page) and reading about the technical aspects of vacuum tubes, how they age, how they begin to fail and how heat is the major factor in their eventual failure, I decided that I would like to try some out.
These tube coolers are supposed to help your tubes last two to fifty times longer than they would otherwise. The basic principle is that a tube cooler is supposed to even out the temperature gradients that occur on the vacuum tube envelope (the glass), and also conduct the heat away from the tube via conduction and convection. In fact, this design of tube cooler is supposed to create a convection current, which is essentially a "static fan". By increasing the rate of heat dissipation, and substantially decreasing the tube envelope temperature by as much as 100 degrees Celsius, there is a marked improvement in extending the life of the tube.
While these Pearl copper tube coolers aren't very expensive, around $10 for a 1-1/2" size, it occured to me that I could easily construct something that is similar to them myself. Shown below is some more on how I made some "tube coolers" for a pair of 5881WXT power tubes (or so I thought). They only take about twenty minutes to make.
Updated
1-26-04: After using these for about a week, I can tell you that
they really do seem to work to an extent. It appears that the glass surface
temperature is considerably lower,
as I can touch it with my bare hand and not
get burned. However, as Bill Perkins from PEARL has related
to me in an email,
because of the material I choose to use for these coolers, what I've done is
inadvertently create something of a "radiant energy trap" that is
quite likely to increase rather than decrease bulb temperature. This
is due to several reasons. There is a very small area of the tube cooler that
is actually in contact with
the glass envelope compared to the Pearl tube cooler. Second, using shiny metal
decreases the emissivity (in this case, emissivity being the ratio of the radiation
emitted by a surface to the radiation emitted by a blackbody at the same temperature)
. The aluminum that I used has an emissivity on the order of about 0.05 compared
to the nearly 0.95 emissivity of the the almost black body PEARL tube coolers. The shiny
aluminum surface reflects some of the heat energy back to the source. This results
in a lesser rate of heat being radiated away the glass tube envelope and possibly
increasing the temperature inside the tube. The dark surface of the Pearl tube
cooler absorbs more of the heat so that it is radiated away from the tube more effectively
than a shiny surface. So I painted them black. I eventually stopped using them but it was an
interesting thing to make DIY version of.
While these are fairly easy to construct, it is hard to get a high quality product with the mundane tools available to the average do-it-yourselfer like me. The metal actually contacting the glass envelope is pretty inefficient due to my primitive manufacturing process. One improvement that could be done to the coolers shown below is the application of a coat of black high-temperature spray paint to the interior and exterior surfaces. This would raise the emissivity considerably, but I question its durability over a long period of time. Also, since I have fan cooling in my amps, I have increased airflow across the tubes which should increase the rate of heat transfer to a degree. This may offset the effect of the radiant energy trap, and help to actually increase the life of the tube. I figure if it makes a tube last twice as long, then it may be a worthwhile exercise to make some of these. Using copper that is chemically blackened would be a more effective radiator than shiny aluminum with black paint. Black anodized aluminum may work, too, but I am unsure of its long term durability. The one thing that I can't do myself is manufacture a carbon fiber blanket similar to the one used by Pearl's tube coolers, which I suspect has something to with its effectiveness.
Having said all that, honestly, you're better off buying the real deal. Pearl has lot of documentation on the effectiveness of their tube coolers as a result of their studies and extensive testing, and they are fairly inexpensive for the benefits they can give you with extended tube life and apparent benefits gained by optimized heat transfer. In the end, this was a fun exercise, and I learned a lot in the process. So, I guess it wasn't a total waste of time on my part. Just for the curious, directly below is some explanation on how I made them.
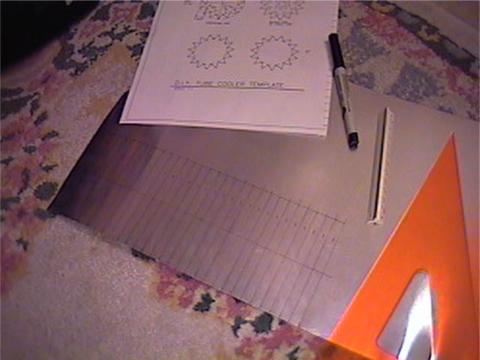 |
First of all, I made up a template on AutoCad and figured
out all of my dimensions beforehand.
To build one, the first thing to do is get some sheet metal that is fairly easy to work with. This is some sheet aluminum I had laying around from a project around the house. I purchased it at Home Depot. Here I am measuring and marking the sizes for a pair of tube coolers before cutting. An extra-fine point Sharpie works well for marking bend points. |
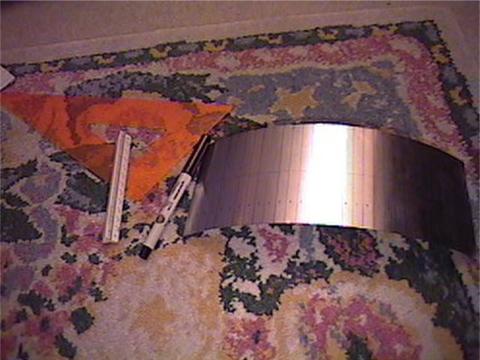 |
Here is the piece after the first few cuts. The shiny side of the sheet metal goes on the outside of the tube cooler. The dull side is in contact with the tube. |
 |
Here is the two pieces ready for forming. I decided the easiest way to do this would be to use a small vise. |
 |
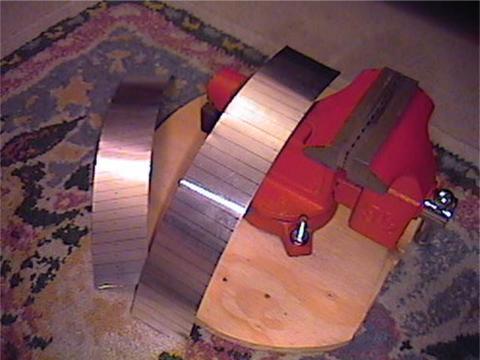
I'm about 3/4 finished making all of the bends here. This stuff is easy enough to bend with your bare hands, but not real flimsy. The only thing to careful of is not to crease the metal too much, or it gets fatigued and will split on the bend. (This happened to the first one I made) |
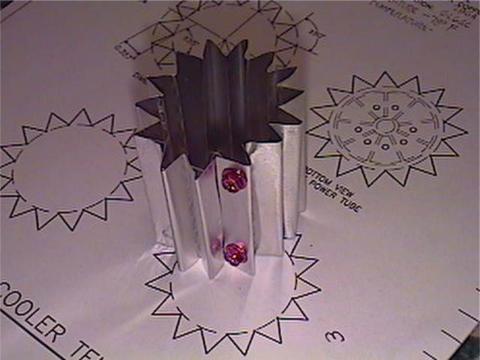 |
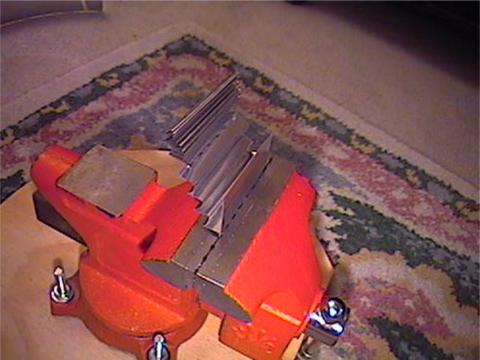
Here is the tube cooler after completion. I used a couple of sheet metal machine screws to join the two ends together. |
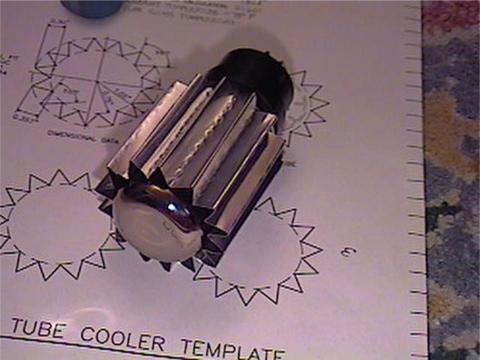 |
Here is the tube cooler installed on the power tube. I have decided that the best method of banding would be to use a two large zip ties, to make the tube cooler fit snug against glass envelope, rather than the o-rings that Pearl uses. I made it fit pretty tightly so that when the tube is hot and the plastic expands, it won't be too loose. You almost don't really need the bands, as the tension of the metal keeps it on there all by itself. But the bands help maximize contact, which is really necessary due to my "caveman workshop" production methods. |
PEARL Tube Coolers Technical Article