The Korg Polysix Synthesizer
By Paul Marossy
Created 1/19/12
I recently acquired this great sounding keyboard from a family member. They took pretty good care of it but it still had some issues nonetheless due to the age of the unit. One of the problems that every Polysix has is that the 3.6V Varta NiCad batteries start to leak and spill corrosive stuff onto the PCB which is near an important IC chip. This can actually render the unit inoperative or make it behave unpredictably if the damage is severe. Mine too was leaking, but fortunately the damage from this on my own Polysix wasn't too bad. Below are some pictures of my Polysix with some narrative as applies.
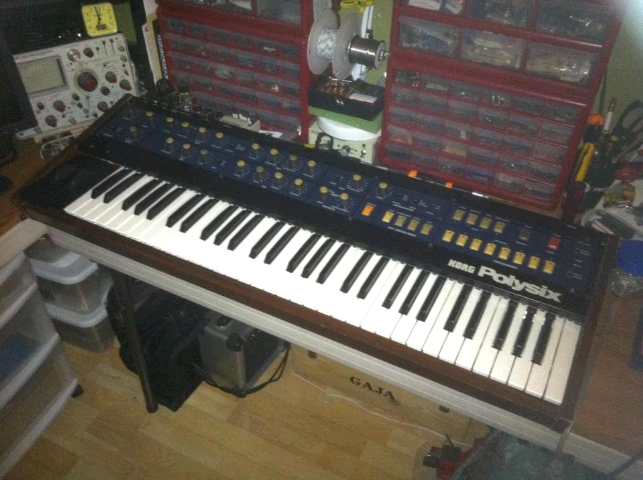
Here is what it looks like. The styling of the unit is not too bad looking considering it's from the early 80s. One great thing about this keyboard is the ability to dial in all sorts of great sounds by simply turning a few knobs. I find it kind of liberating to not have to be stuck with a certain patch on most affordable modern digital keyboards that you can't really edit on the fly.
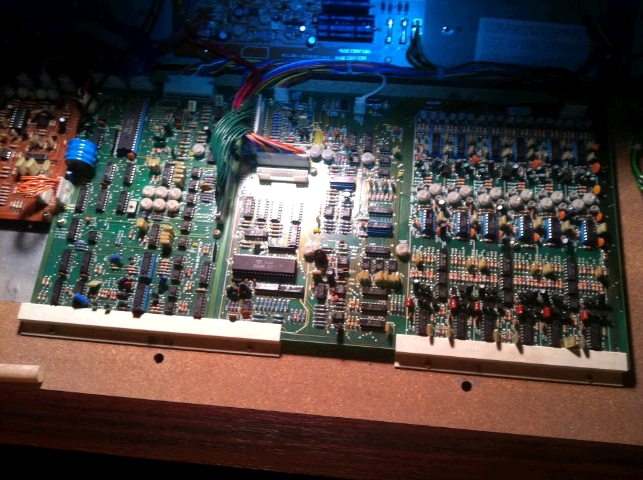
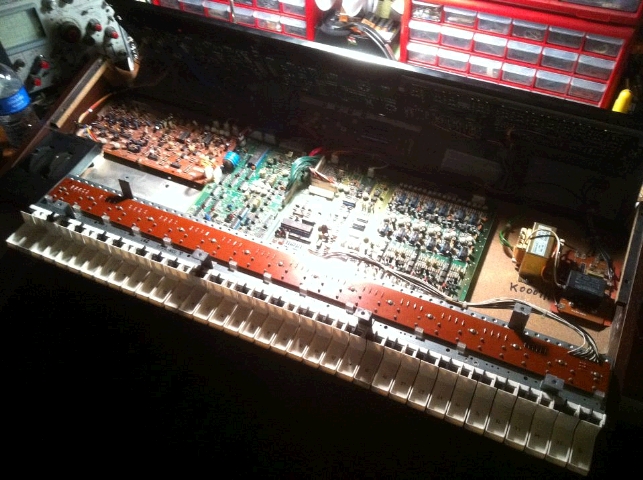
This is the patch assigner and voice PCBs. The leaky blue 3.6V NiCad battery can be seen at left.
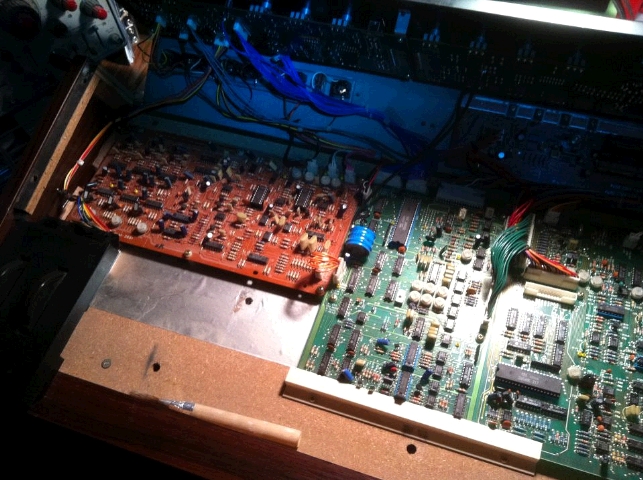
This is the effects PCB. From looking at the date codes on the various parts in the unit, this one looks to have been made in 1982.
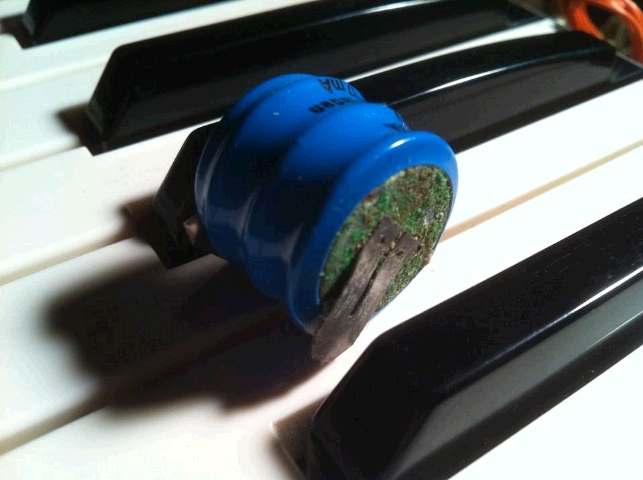
Here is the old NiCad battery after removal from the PCB. I followed the instructions on how to replace this battery with a new lithium type at This Page.
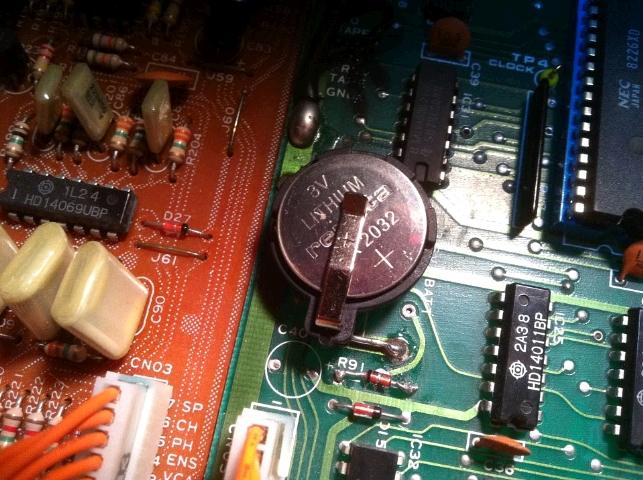
Here I have the new battery installed. I didn't have to actually completely remove this PCB to make the repair. Most of it I was able to do from the top with the PCB connectors in place. I only had to remove one connector in order to tilt up the PCB in order to desolder the old battery connections after I cut out the battery. It really is a simple procedure for anyone with a little bit of this type of experience. Fortunately the PCB and IC chips were not damaged at all.
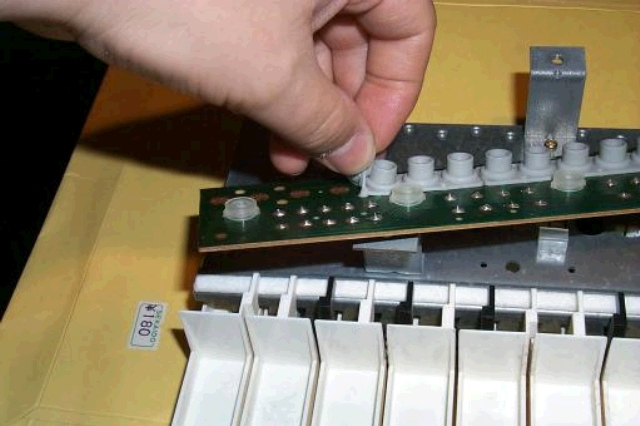
Next I moved on to re-working the keyboard to fix intermittent contacts and sticking/loose keys. This entails pulling out the keyboard section and removing all the keys from the metal frame to which they are attached. The picture below shows the little rubber cups with built-in conductive elements which are actuated when depressing the keys.
This is how the keys look when removed from the frame. I always find it interesting how things are designed when I'm taking things apart to fix them.
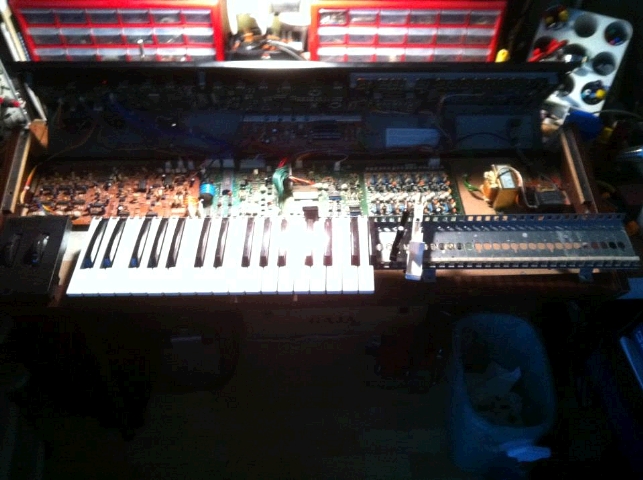
Here I am about half way done with the keyboard part of the project.

Here I have all the keys re-inserted into the frame and it is ready to be re-installed.
Other than cleaning out a lot of dust from the inside of the unit, the rest of what had to be done was very minor. I fixed the hack job done when the volume pot was replaced at some point in the past and fixed one of the program buttons which was working intermittently. After desoldering this troublesome switch, I thought I was in trouble with needing to find a replacement momentary switch. But before I did anything else, I sprayed some contact cleaner into the small openings in the switch and pressed the button repeatedly. Then I checked the switch with a continuity checker built into my multimeter to verify that it was making contact, which it was doing fairly reliably. I repeated the process a couple more times until it worked every time. Some people have said that these buttons are prone to failure, but I think probably 95% of them could be fixed doing exactly what I did, perhaps even without having to remove the switch from the PCB to which they are attached. Now everything is working well and the unit is very reliable now. Time to make some music!!!