My New DIY Pedal Board
By Paul Marossy
Last Updated 11/15/03
Most people that
use analog effects probably have dreamed of an "ultimate
pedal board". Most of what is on the market today doesn't
appeal to me or work for me. It is possible to make your own
ultimate pedal board and save a lot of money, too. With pedal
boards being, in my opinion, ridiculously expensive - $200-300, I
found a cheap alternative. This is my ultimate pedal board that I
made out of a rather flimsy old bass guitar case. Since the case
was made out of wood, to make it smaller, I simply I cut about
12" off of one end of the case, and attached the existing
side pieces to the place where I cut it down. Then I re-installed
the binding on the end, which was originally just glued onto the
case. I used some contact cement to glue it back onto the case.
You can see the binding on the picture at the end of this page.
Adding some
stiffeners here and there, relocating some hardware, and adding
some new hardware (such as metal corners) made this a very
practical and useable item. I put a piece of 1/4" plywood in
the bottom and got some two-piece hinges that allows the two
halves of the case to seperate from eachother. All the new wood
parts got a coat of flat black spray paint. I also left a place
to put all of my cords when I pack it up. When all closed up it
looks like an overgrown briefcase. Now this has been transformed
from a whimpy case to a very sturdy case. This has been
working great! What's nice about this little project, is that it
literally didn't cost me a dime - it was done entirely from
things I had lying around the house and garage. Even the bass
case didn't cost me anything, it was thrown in when I bought a
used bass. The case eventually got replaced with a nice gig bag,
so it was just sitting around taking up room in my closet. It
turned out very well for a spur of the moment idea and it only
took a day or so to make it.
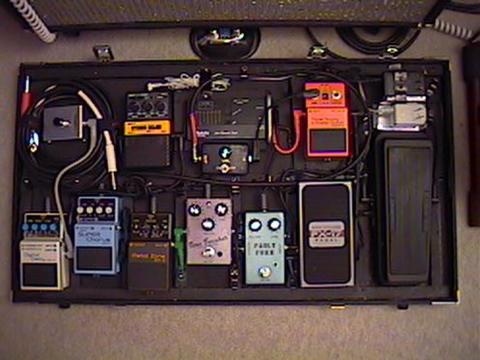
From right to left: Modded Dunlop CryBaby , DOD FX-17 active volume pedal, " Pauly Fuzz " (Black Cat OD-1 DIY clone), " Tone Tweaker " (Fuzz Face variant DIY clone), Boss Metal Zone, Boss Super Chorus, and Boss DD-5 Digital Delay with a tempo controller that I made. Above those pedals is an 80's Arion SAD-1 analog stereo delay. The reddish pedal at upper right is a Boss PSM-5 Master Power Supply.
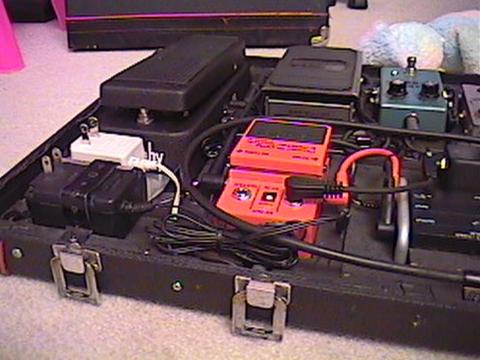
Below is a view from the rear of the pedalboard. At lower left corner is a 200mA PSA-120 Boss Power Supply. The power supply is held to the bottom of the board with a metal pipe hanging strap that I obtained at Home Depot. Although I made the strap fit very snugly on the power supply "wall wart", between the body of the power supply and the strap I placed some self-adhesive 1/16" neoprene foam to provide a frictional surface to keep the power supply from moving around and possibly shorting the 120VAC supply. To supply power from a 120V wall receptacle, I just plug an extension cord onto the stationary power supply. To the right of the power supply is the Boss Master Switch PSM-5 which distributes power to all of the pedals on the board via a Boss parallel connector cord and also it serves as a master bypass switch. The smaller transformer is a 100mA unit dedicated to my power hungry, but good sounding Arion SAD-1 stereo analog delay.
To keep the wiring nice and neat, I used some plastic hold-downs that I had purchased from Radio Shack and some small black zip ties to bundle the interconnecting wiring together, making something that looks rather like an automobile wiring harness.
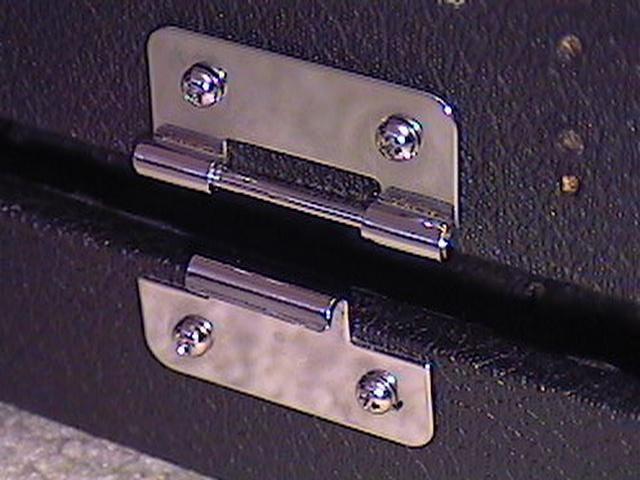
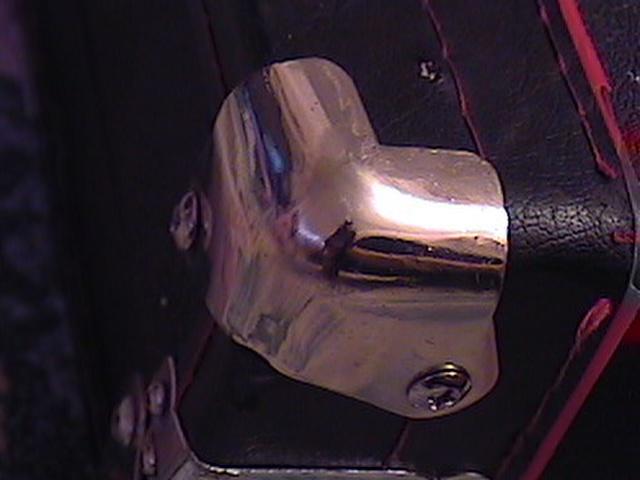
Below is a detail of the two-piece hinge. I pulled this off of a commercially manufactured pedal board I bought many years ago. It was too small to do anything practical with it, so it got cannibalized. You can also manufacture one with some careful cutting using a Dremel tool equipped with a cutting wheel and a little filing with a hand file. All you need is an ordinary 1-1/2" hinge that you can buy at Walmart.
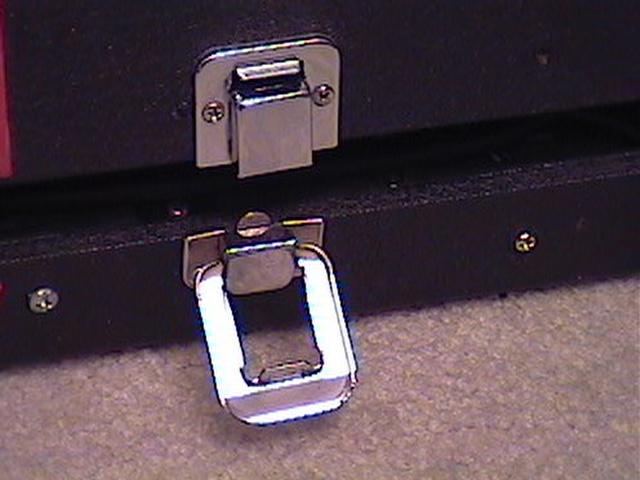
Below are some pictures of the latches and metal corners. The foam in the top half of the case helps to keep the case closed and keeps the latches in place. The latches were part of the original case and were relocated as necessary. The metal corners came from a inoperative el cheapo amp that a neighbor put out on the curb on trash day, which I grabbed, and of course recycled. I also had to relocate the carrying handle.
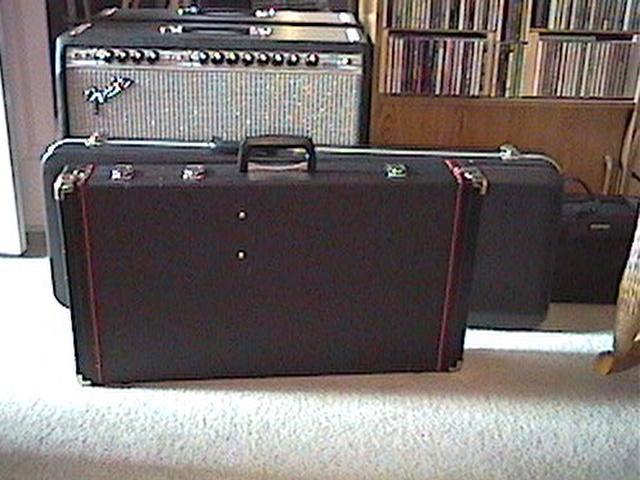
All buttoned up, the case measures 28.25"x15.875"x3.75" and weighs about 25 lbs. with my current compliment of pedals. The foam in the top half of the case is custom fitted to keep the pedals from going anywhere during transport. I also put some new rubber feet on the side opposite the carrying handle. It's not a flight case, but it certainly is sturdy enough for everyday use. I have been using this for about two years now with no problems.
My pedal board seems to be constantly evolving. I have recently added the modded new manufacture Cry Baby wah pedal. It sounds pretty good with the mods that I made, quite vocal sounding and much warmer compared to what I started out with. I also recently acquired the DOD FX-17 Volume/Wah pedal. I use the DOD for the volume pedal. They have been out of production for a while, but it works well with my setup. They utilize a unique circuit that uses neither a pot or an optical circuit.
I ended up having to move the power supply to the opposite corner of my pedal board, because my wah was picking up a hum from being too close to it, and I had a two foot long patch cord from RadioShack that was also picking up hum as it went by the transformer, something was only noticed when using high gain distortion pedals.
I also recently made an output level control box to tame the signal going to my amp a little bit. I started out with a Ernie Ball passive volume pedal, but since I have been using the Boss FX-17 volume pedal, the signal going to the amp is just a little too strong for my liking. So this is my solution. It's simply just an input and output jack wired to a 100K audio pot which is connected to the input jack, the output of which goes to the output jack. It dumps some of the signal to ground, decreasing the volume. I usually have it set at about 2/3 of maximum volume. I also installed a bypass switch, just in case I want to bypass it.
I hope this page gives you some ideas for your own pedal board design.