|
Refinishing and Modifying A Solid Body Electric Guitar
(My Project Guitar)
Created 12/3/04
By Paul J. Marossy
Last Updated 12/2/08 & 7/2/09
While I don't really need another guitar, I thought it would be fun to take a Strat body and turn into a highly customized guitar. I got the initial idea from looking at the tutorials about refinishing guitars at
www.projectguitar.com, and things developed from there. I found a suitable candidate for my project via ebay.
The original concept was to just simply refinish it, but as time went on, I decided to make it a project guitar which would utilize a fabric top under some thick clearcoat, some built in active electronics and some other things that I have pondered about doing. Below are the details of this project.
|
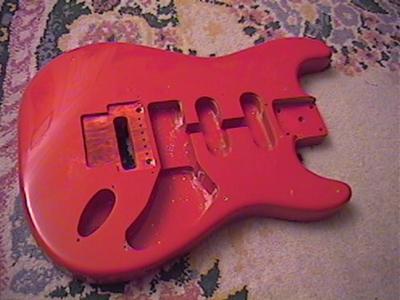
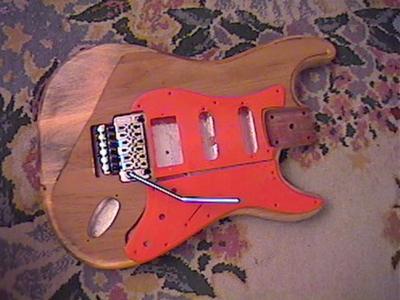
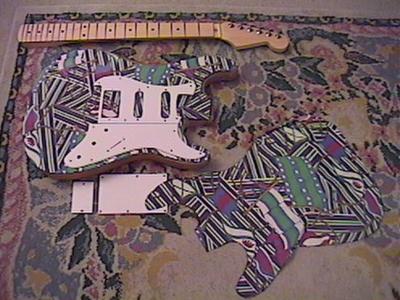
Here is the body as it looked before I started on this project.
Looks like the Fender Fiesta Red color to me. The paint is pretty thick. There was the original finish, then a thick coat of sanding sealer covered
by a thick coat of paint - about 1/16" thick altogether. I'm glad that I went throught the trouble of removing all of the old paint, as I feel that
too much paint can hurt the tone of an electric guitar to some degree. If I would have done my finish on top of the existing finish, it would have
surely been detrimental to the resonance of the body, in my opinion.
|
|
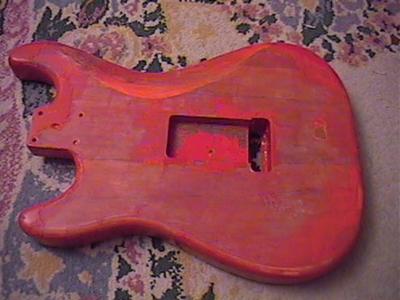
The first thing that had to be done was to strip the old paint off. I decided to use some paint stripper that I purchased at the local hardware store.
Here is most of the back stripped after doing a test to determine about how long I should expect this process should take. Under the paint, a three piece body was
revealed. I'm not 100% sure what type of wood it is, but I think it is Alder with a walnut veneer on top and back.
|
|
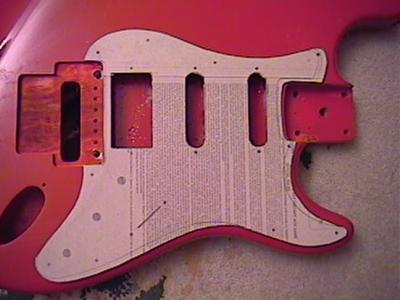
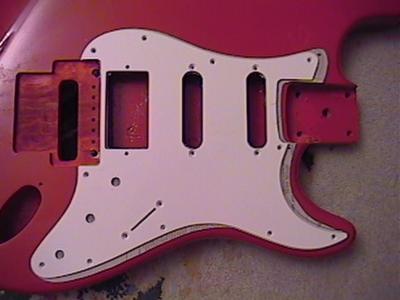
While I was sizing up the project in between stripping the paint, I compared my old MIJ Strat pickguard to this body, I noticed that it is slightly different
than a Fender Strat body, which indicates that it is some kind of Strat copy. The pickguard is going to have to be custom made. I created a template for the new pickguard
by using the side of a large cereal box. I was going to make the new pickguard out of aluminum, but changed my mind. I may still do that at a later date.
|
|
Here you can see the difference between the standard H/S/S Strat
pickguard and the one that I will have to create. I also needed to carve out the cavity for the Floyd Rose locking "tremolo" to match the one on my MIJ Strat.
|
|
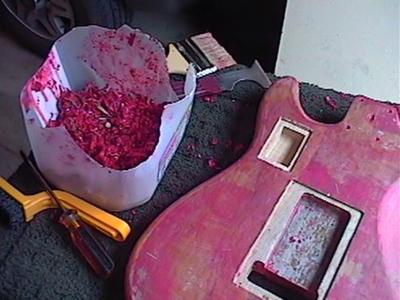
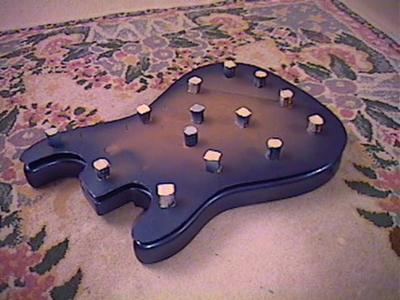
Here I have just finished stripping all of the paint off of the body.
It took a total of about five hours to strip all of the paint off and I used up a pint of paint stripper in the process. There is
about three inches of paint shavings in that milk jug at upper left. You can also see where I carved out the area around the trem spring cavity
so that my cover plate would be flush with the body. I also carved out a cavity for a 9V battery to power the onboard electronics that will be
installed. All carving was done with a wood chisel, which is a tool that I have never used prior to this project.
|
|
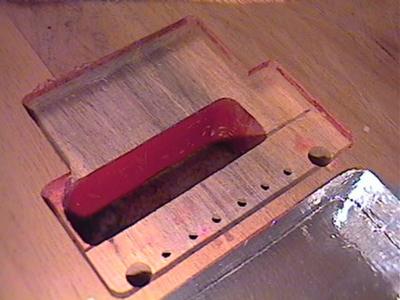
Here is a close up of the new trem cavity on the top of the guitar
after the initial sanding was completed. This is actually the first part of the body that I carved out. I guess I didn't do too bad of a job considering
that I have never used a wood chisel before this project...
|
|
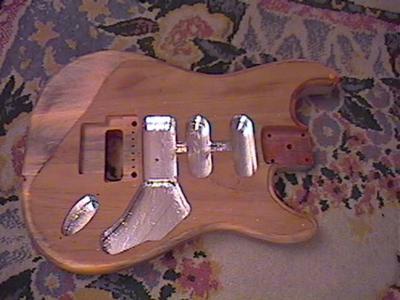
Here is the body after sanding. I started out with 60 grit to strip off the old finish,
followed by 100 and 220 grit. The edges are the areas I am most concerned about since the top and back will be covered by a fabric. I also decided to shield the cavities
before gluing the fabric to the body. It took about 4.5 hours to sand the body. About half that time was spent sanding with my oribital sander. The sanding sealer
was pretty stubborn.
|
|
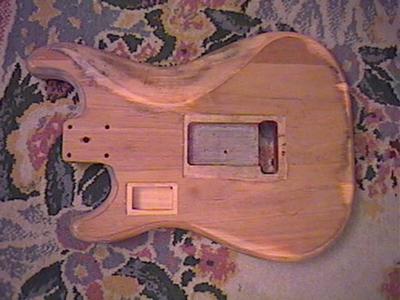
Here is the back of the body after sanding. This sure looks
a lot better than it did the other day! I will also have to make a custom trem spring cavity cover and battery access cover as well. Before
I finish the body, I need to check the fit of all the parts. Until I receive my pickups, Floyd Rose trem, neck, neck plate and tuners, I can't
do a whole lot with finishing the body, so I decided to focus on the onboard electronics.
|
|
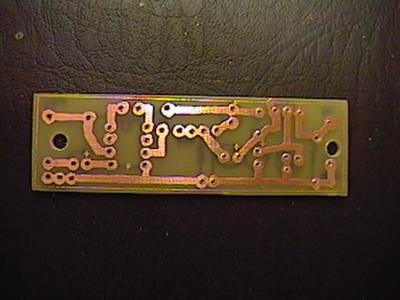
Here is my self-designed PCB. It will contain the
preamp circuit
and the
sustain circuit.
They will both be able to be bypassed via a switch. At this point, I haven't decided yet on the exact type of switches I will use. I will
make my final decision on that when I fabricate the pickguard.
|
|
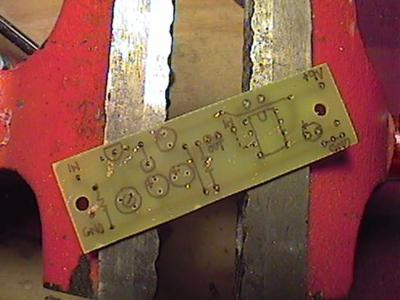
Here I have done my usual markup of the PCB before I install components.
For me, it makes populating the PCB go a lot faster and easier. The PCB measures about 3/4"x2".
|
|
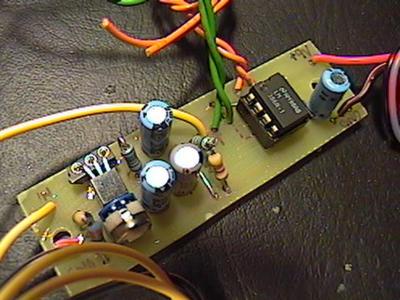
And here is the PCB all ready for installation, which will have to wait
until I fabricate the pickguard. I don't anticipate that part to be easy...
|
|
A few days later, I fashioned a pickguard, trem spring cavity cover and the 9V battery
compartment cover from a broken, discarded plastic tool box. I didn't have any particular reason to use this toolbox for a source of material other than it was just there.
One benefit in using it is that the kind of plastic that it is made from doesn't get the static buildup on it like some single-ply pickguards have done to me in the past.
I cut and shaped these pieces by hand with a Dremel Tool. It took a while, but I am happy with the results. I will be painting these pieces with a white spray paint made for
plastic, after I receive the neck and check the fit of the parts. I went with a two-piece pickguard per Mark Hammer's suggestion. It took a little while for me to think about how
to make that look good. One day the idea on how to do that just came to me, so I went with it.
|
|
Several days went by while I was trying to decide what fabric I wanted to use,
and if I even wanted to do it at all because of what some say about it having adverse affects on the tone of the guitar. Since most people who have done a
fabric top on their guitar had more good to say about it than horror stories, I followed my intuition and decided to go with the original fabric that I wanted
to use since the beginning of this project. When I am done, the finish on this guitar
will still be thinner than the original finish was before I stripped it off.
At this point, I have the fabric cut to rough size and I am ready to glue it onto the body.
I have also painted the pickguard, too. Things are really starting to come together now.
|
|
Here I have the top piece applied and trimmed. I decided to paint
the cavities after the process of applying the coats of sanding sealer is finished. The edges of the body will be colored a metallic cobalt blue,
in a sunburst pattern.
|

|
And here is the back with the fabric applied and trimmed. You can also see
that the battery access cover and trem spring cavity cover have also been painted. A first, I was kind of wondering about how durable the spray paint
would be on these plastic parts, but so far, it seems to be pretty durable stuff.
The whole process of finding the pattern I wanted with respect to the body,
cutting the fabric, gluing it to the body and trimming it took around three hours. Next on the list of things to do is to finish my neck with a tung oil finish.
Once the body is completed, the I can attach the neck and finish the electronics portion. I'm about three weeks into this project now, but I am getting
closer to completing it - I have been working on it for an hour here and there after work and on the weekends.
|
|
Since the weather has been unseasonably cold and wet, completing the body will
have to wait a few days. In the meantime, I decided to work on the wiring a little, so I populated the pickguard. I abandoned the
idea of the sustainer circuit because too many others have had problems getting it to actually work. So, I cut off that part of the PCB and installed
the preamp section on the pickguard. Now it measures about 1-1/4"x3/4". I fastened it to the pickguard using a bracket that I fashioned out of a piece of sheet aluminum.
The tone pot holds the bracket in place. I got the idea to use a mounting bracket from my experience in the creative use of
mounting brackets on my Shaka Tube
project.
|
|
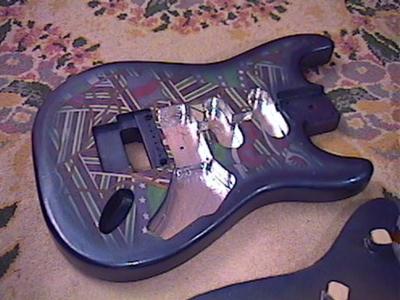
Finally the weather got back to normal again, so I used the "poor boy sunburst" method to
do the sunburst, per the tutorial at projectguitar.com
. It turned out pretty well considering I have never attempted doing a paint job like this. This part was in two steps -
I did the body cavities first, and then the sunburst.
|
|
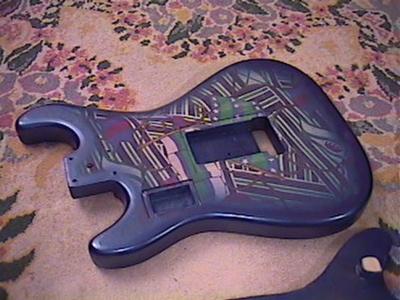
Here is a view of the front with sunburst completed. The fabric here looks a
little bit dull and faded because of the roughed up surface of the sanding sealer. When I apply the clear coat, it will brighten and darken up considerably.
|
|
And here is a view of the rear. The next step will be to apply the clearcoat.
I decided to go with a polyurethane coating because it's pretty tough stuff. I don't want to have to ever mess with the finish ever again once I'm done with the body!
After a few days of curing, the body will be ready for installation of the electronics. In the meantime, I can focus in finishing the neck. The frets are already masked
off as I'm writing this, so I can start on it anytime.
|
|
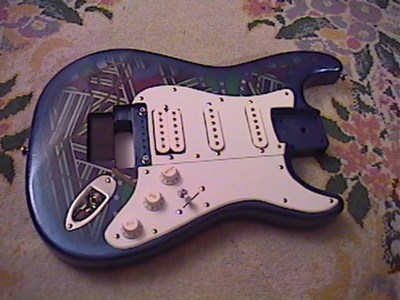
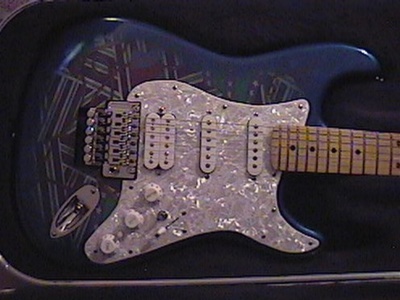
At this point, the body is done, the electronics have been installed and the body has been
buffed by hand. There is a few minor flaws, but overall, it turned out pretty well considering that I have never tried anything like this before. The fabric didn't brighten
up quite as much as I thought it would, but I am still happy with the results. All that is left to do now is to finish the neck and attach it to the body and to set up the guitar.
I used a mini DPDT switch for the preamp switch.
|
|
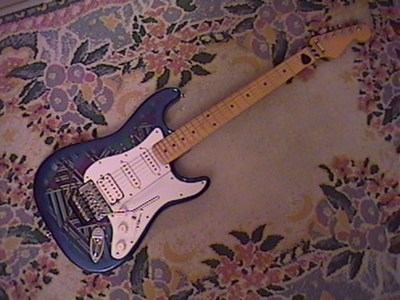
And here it is ready for action. I finished the neck with tung oil. The
neck has a nice satin feel and the fingerboard feels good. The neck fits into the neck pocket nice and snug. The finished guitar is suprisingly heavy and has great sustain.
The preamp circuit provides some noticeable boost and the overall tone is nice and round. I am pleased with the results of my first effort at doing something like this.
If you want to see some close ups of the body, click on the following links:
Image 1,
Image 2
, Image 3
.
|
|
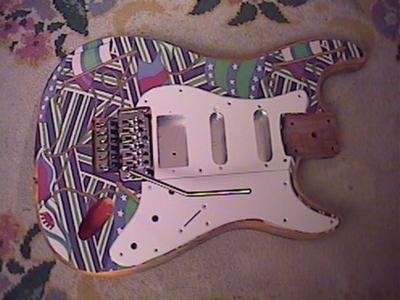
About 18 months after I was finished with this project, I decided to replace the
pickguard and back cover plates with a new pearloid pickguard material patterned after the original ones that I made. To my dismay, the originals turned yellow due
to the polyurethane changing color. I think this looks a lot better, however.
|
|
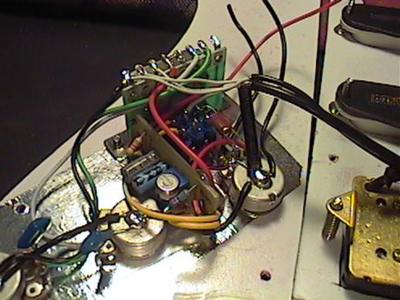
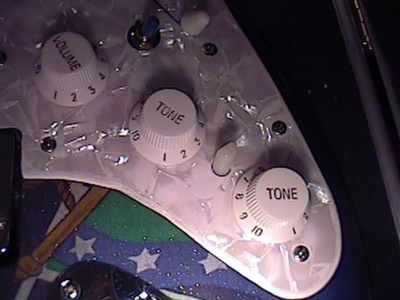
While I was at it, I decided to replace the onboard preamp with a Maestro
Boomerang wah circuit built into my guitar to mimic some of the tones Frank Zappa used to get with his built-in dual parametric filters. Essentially,
this is a variable resonant filter built into my guitar. I can get some cool tones with it. This picture is showing the control knob for it (between the tone knobs).
I have it this way so it takes a deliberate effort to change the setting. I designed a
compact PCB layout for it that will fit in the control cavity of a Strat.
If you want to see how the wiring looks, click on the following links:
Image 1,
Image 2
,
Image 3.
I think I'm finally done with this project now! I noticed that this guitar is pretty heavy, so I weighed it: it weighs 9.5 lbs! It's a bit on the heavy side, but it really does have a nice tone to it, especially with clean tones.
|
|
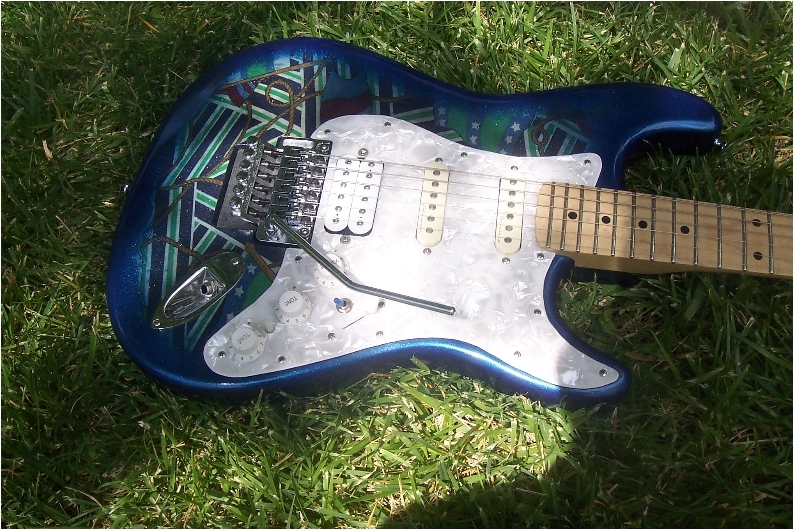
This picture shows the finish a little bit better (taken outside on a sunny day, under the shade of a tree). It's hard to capture the depth
of the finish with the camera I have, but it gives you some idea. It looks much better in real life when you can see it up close and move it around to see it glitter and stuff.
Click here
to see some pictures in a larger format.
|
Well... I thought I was done. Nearly two years after I last updated this page (Oct 2006), I did a few more modifications to this guitar. I bought an F-Spaced bridge position DiMarzio FRED about 15 years ago and had it in one of my Ibanez guitars for a long time. I was really into Joe Satriani at the time, and found out that was his main pickup for years, which is the main reason why I got it - and because I liked the way it sounds. Anyway, I decided to take it out of that guitar about a year ago and it I had it sitting around since then. Recently, I decided to put it into this guitar that I now dub my "SpankenStrat". I must say, it made this guitar sound really good now. It's perfect for my style and has the exact sound that I have been trying to coax out of this guitar. I have worked on this project guitar quite a bit now. I think it's exactly what I want now, and it has a lot of good tones. I guess some things that are worthwhile can be a pain.
The next thing I decided to do after that was to add a coil tap on the humbucker so I could get a single coil sound using the bridge pickup. As soon as the push/pull pot with integral switch arrived, I tore the guitar apart and did the coil tap mod. I must say, it really does sound quite good! Not bad at all for a coil tap arrangement using a humbucker pickup. I think it even sounds better than the coil tap on my Parker Mojo Nitefly. And it's nearly as loud as it is in humbucker mode.
A few months after I last updated this page, I obtained some Fender "Hot Noiseless" pickups for the neck & mid positions. I went with these pickups because they were designed specifically for Jeff Beck, and I very much like the tones he gets out of his Strat, so it seemed like a really natural choice for me. After tweaking the tone caps a bit, they sound very nice in this guitar. The design of these noiseless pickups is very interesting. They appear to essentially be a stacked humbucker, but with a single coil sound. There is a coil on the bottom of the pickup and on the top side is what looks like a conventional single coil pickup from the exterior. The pole pieces extend thru both coils, and are in between a pair of ceramic magnets which are oriented so that the north poles are facing up. The DC resistance of the pickups are 10.4K with a weighted resonant peak of 3.1kHz, so they sound strong and full without being overly bright. They match up nicely with the DiMarzio FRED on the bridge, which has a DC resistance of 10.07K and a resonant peak around 5.34kHz. The end result is a very nice sounding combination with the strings I use on this guitar, Ernie Ball Hybrid Slinkys.
This guitar can get a wide range of great tones and I feel like I could play virtually any kind of music with it - from hard rock, to chicken pickin, to clean jazz, to blues and anything in between. It's also fun to get comments about it because it's one of a kind, and it is kind of cool to play a guitar that you made yourself.
Wiring Diagram
My Home Page
|