Benchtop DIY Audio Oscillator-Tester
By
Paul Marossy
Last updated 05/22/03
Here
is an 1kHz audio tester that I recently built. It is based on
R.G. Keen's " Quick and Dirty Audio Test
Oscillator
".
It is a basic twin-tee oscillator circuit. It provides a sine
wave with a frequency of about 1kHz. I built it per the
schematic, and added a selector switch to select the output
range, and a volume control. For the enclosure, I recycled an old
A/B Switch box which I found in a thrift store. The rest of it is
constructed entirely from parts I had lying around. Below is some
details of the project.
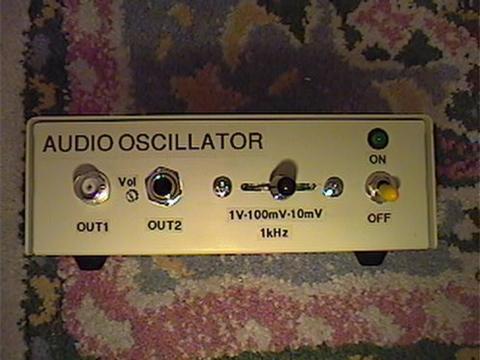 |
Here is the front view. From left to right: BNC output, screwdriver volume control, 1/4" jack output, voltage range selector switch, and an on/off switch with a power-on LED indicator. |
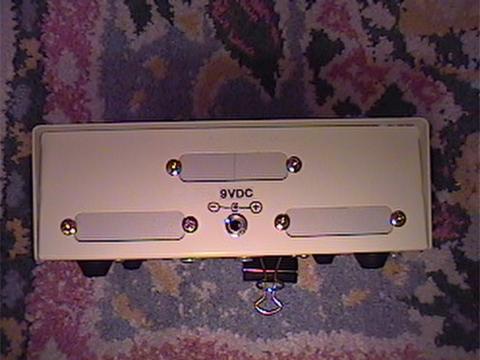 |
This is the back. I covered up the cable connector openings with pieces of plastic cut from an old 3.5" floppy disk. Why a floppy disk? Simply because it was a reasonably close color match to the enclosure color. An 1/8" power jack allows for a 9VDC 200mA wall wart to power it up. |
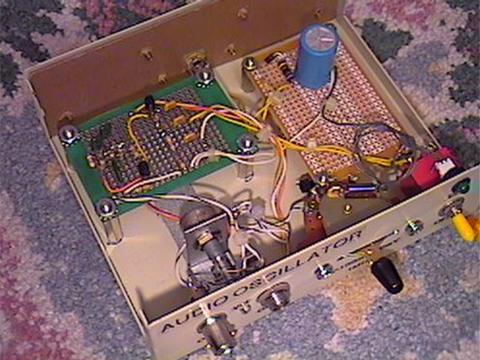 |
Here is what the inside looks like. The upper left perfboard is the oscillator circuit, and the upper right perfboard is the power filtering section, a hum-busting circuit using a 2200uF cap and 100 ohm resistor to eliminate 60 cycle hum. For the output range switch, I used a homeless guitar pickup selector switch. To make the slot for the range selector in the face of the enclosure, I simply used my Dremel tool with a cutting wheel to make the opening and finished it with various small files. |
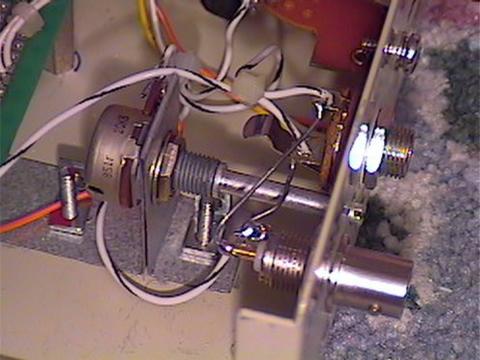 |
Here is a detail of the mounting of the volume control pot. The mounting bracket is constructed from a 3/4"x4" strip of sheet metal folded as required and then drilled to accept the pot and two mounting screws. The shaft of the pot uses one of two existing holes. I utilized the other existing hole for the 1/4" output jack. I drilled the other six holes needed in the enclosure with a hand drill. |
Aside from spending
next to nothing to build this project, the cool thing about this project is
that I didn't even have to paint the enclosure. I just removed the existing
graphics on the front by lightly rubbing them off with a little green 3M pad.
They came off with minimal effort and left the paint underneath completely intact.
For the labels, I used a label making machine.
This will now serve as my super duper benchtop audio tone generator for use
with my guitar effects prototyping. It turned out pretty well for a spur-of-the-moment
idea. It took two evenings to construct, troubleshoot, and perfect.